 I made prints using my Gelli Arts Printing Plate for the first time, and I now understand why other posts about it say it is so addictive. I could make prints with this for hours, if not days or until my paint and ink resources run out.
Seriously.
This was a blast.
Why? Because it is absolutely fascinating to see how the prints turn out.
For my first attempt at this, I grabbed out the Gelli plate, of course, and placed it on an old cookie sheet. I tend to get a little carried away and make a mess when I try new things, and the cookie sheet helped to protect my work surface. It also made moving the plate around easier which allowed me to work with and view it from different angles. (If you don’t have a cookie sheet to devote to this, I think wax or parchment paper would work fine.)
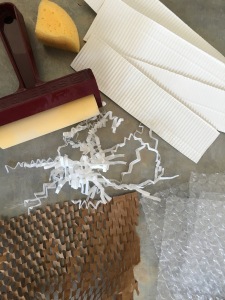
Then I grabbed some of the items that I have been saving like a little packrat to use for texture. In this case, it was bubble wrap, corrugated cardboard, some crinkled paper that had been used as packing material, and some heavier brown paper with an interesting pattern cut into it, which had also been used as packing material. Lesson learned here – hang on to that packing material because it has some cool texture to it. I also grabbed a brayer and a sponge for spreading the paint on the Gelli plate.
I picked three colors of acrylic paint – yellow, magenta, and blue. Being basic colors, I figured they would blend in interesting ways and make the finished piece look like more than three colors were used.
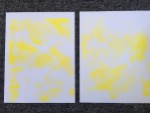
I started with yellow, because it was the lightest color. Honestly, I don’t know how much it matters which color you start with. This just felt like the right thing to do this time around. Perhaps I’ll start with the darkest color next time and see what happens. Anyway, I spread the yellow paint on the plate then pressed some of the texture materials into it. Before placing a piece of white card stock on it, I sprinkled some of the crinkled paper on the plate. Then the white card stock was placed on the plate and I used a second brayer to press it onto the plate. The results were interesting. I wasn’t sure what to expect from the crinkled paper, but it seemed to cause big empty splotches on the paper. Good to know.
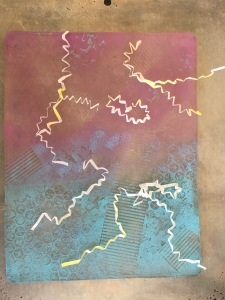
Then I realized I was starting to run out of time, so I decided to go half and half with the magenta and blue on the second pass.
The magenta was spread using the brayer, and I used the sponge to spread the blue. It was neat to see the difference this made. The brayer was smoother, and the sponge had a lot more texture, which completely makes sense. The smoothness and texture showed up on the finished project, too.
The final prints turned out pretty cool.
One thing to note… I had seen several places where people took a ghost image or a second image after the first. That didn’t work out so well for me. Perhaps I didn’t use enough paint to begin with, and had to add more for the second print. What was interesting, though, was that some of the texture on the plate held, even with the extra paint added. I will definitely have to experiment with this more.
So now what does one do with these interesting looking prints? Well, they could be used as backgrounds on cards, or as part of mixed media pieces, or just to look cool somewhere. There are lots of possibilities. I have already used them in a project, which I will write more about in a few weeks.
Have you tried using the Gelli printing plate? If so, please share what you have done that worked well and didn’t work as well as you had expected.


