
First of all… Happy New Year!
I realized I haven’t posted in a couple of months. NaNoWriMo took up most of my time, energy, and words in November (I won with 50,115 words… woohoo!!). Then December brought a big project for work and making Christmas cards at home (post coming soon about the cards). My plan for cards involved making paper, so I spent a couple of hours doing just that.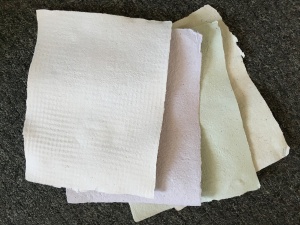
In early fall, I bought a paper making kit from Paper Alice and was happy with how easy it was to make the paper. I managed to make a huge mess in my kitchen, but that just means it was more fun, right?
The kit had good instructions with pictures, so I just followed those. I didn’t take pictures while I was making the paper because my hands were dripping wet most of the time and I didn’t think ahead to grab an extra towel and my phone or a camera to take pictures. Next time…
The basic instructions were to tear up some paper and put it in a blender, cover it with water, blend the crap out of it, pour it in the frame, then take it out to let it dry. There is a little more to it than that, but that was basically how easy it was.
As for tips, it seems like you can use pretty much any type of paper to do this. I decided to use this as a fun way to take care of some shredding that needed to be done, so I used both regular paper (credit card offers, old statements, etc.) and store receipts. The store receipts were on lighter paper to begin with, and resulted in, shocker, lighter weighted paper. I also found that using the receipts, more were needed to make a sturdy sheet of paper.
You can mix in all sorts of things to make really interesting paper, like grass,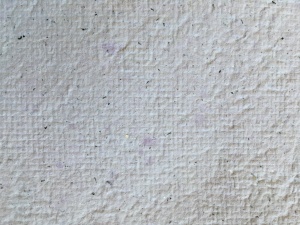 flowers, glitter, or anything else along those lines. One tip received from Paper Alice herself was that if you are going to use fabric or anything like that with fibers, add them last because they can and will get tangled in the blender. For this first round, I just put in some glitter and quickly found that a little will go a long way.
For the pulp thickness, I found that if it sorta plopped a little bit into the water in the frame, it worked better than if it was too runny. Pulp that was too runny resulted in paper that was just too thin. One of the great things about this project is that if you don’t like the paper you made or make a mistake, just throw it back in the blender and try something else.
The paper tends to warp while it is drying. I tried to flip it over every couple of hours, which helped a bit. You can iron the paper to help it dry and be more flat. Ironing it under a textured towel will transfer the texture onto the paper, which can be pretty cool (see the top sheet of paper in the image above).
In addition to having fun making a mess, I had a blast seeing how the different combinations of paper and receipts resulted in different weights and shades of paper. I also liked the idea of using it for shredding junk mail and receipts.
Next time I make paper, I’ll think ahead and grab the camera to document the process. 🙂