Rings and Things

In my last metal clay class, we focused on kinetic rings. In the past we have only worked with Art Clay, but this time we also used FYI Silver Metal Clay by Val Lewis.

FYI Silver Metal Clay Bits
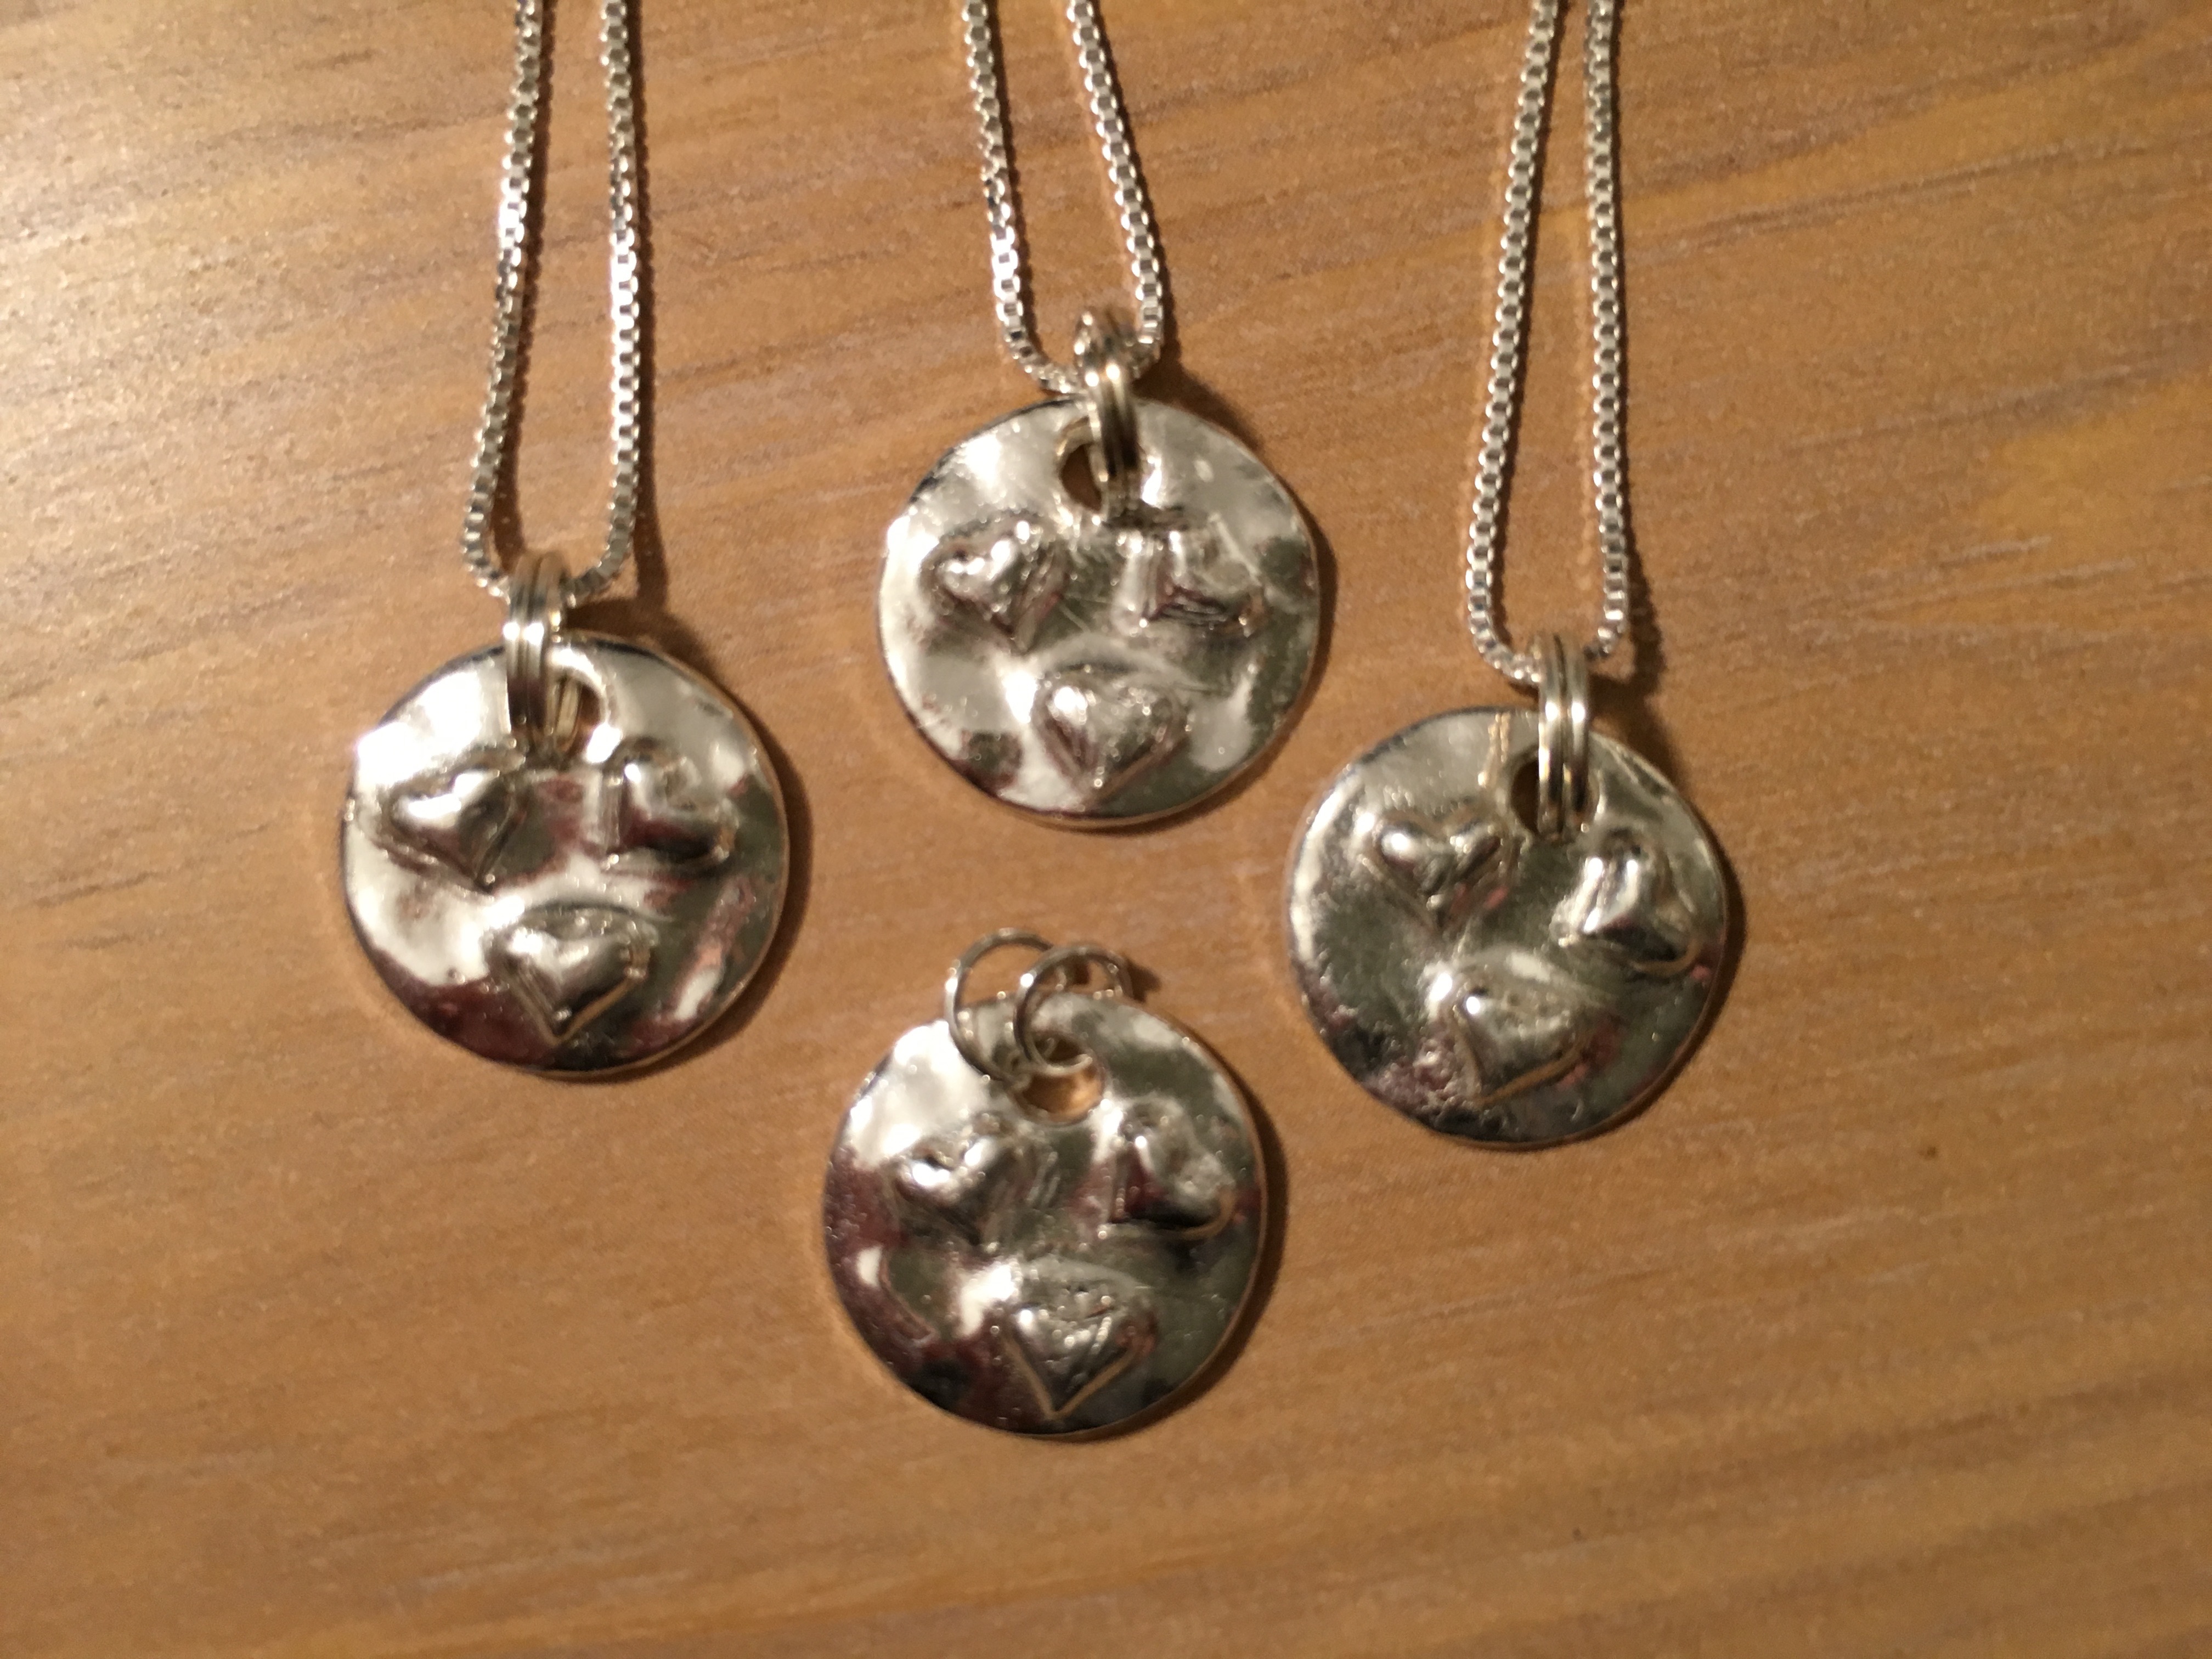
We started with the FYI clay because it needs to be fired in a kiln and we needed the pieces to be ready for the next steps for making the rings. I hadn’t worked with this clay before, but it was quite nice.  We used 10 grams of the FYI clay, and I was able to make the 4 pieces you see here. For reference, the round pieces ended up about the size of a penny. (Note that it is tough to take nice pictures during class with your phone with silver all over your hands. :))

One thing to note about the FYI clay is it has a higher shrinkage rate than the Art Clay. The picture on the right shows pencil lines that were drawn before firing. You can see the pieces shrank about a 20-25%. The advantage to this is you could create very small designs more easily because you’d have more clay to work with before it shrinks.

I had some extra clay after making the 2 pieces for the spinner ring. I used it to make a small butterfly pendant for 1 of my nieces and another squiggle piece that I plan to use as part of a necklace. Of these 4 pieces, the squiggle is my favorite. I want to make more pieces like this simply because they are more my style. Continue reading

Sister Necklace Pendants

I wanted to make matching necklaces for me and my sisters. So in my last metal clay jewelry class, I did just that.

Silver Sister Pendants

My hope was to have pendants that all matched, but were all just a little different, like me and my sisters. So I made a mold using polymer clay by pressing a rounded end of a tool in it to make a bit of a wavy texture then pressing a small heart charm into it three times – one for me and each of my sisters.

After the polymer clay was baked, I took it to class and used it as a mold for the silver clay. The circle was cut slightly different for each one, creating the slight variation on each pendant. The photo shows the results, and I was super excited about how they turned out. Continue reading

Copper Weave Pendant

My last metal clay jewelry class was a blast. After the class, I made a new copper weave pendant and it has become one of my favorite pieces.

Copper Weave Pendant

It was a little tricky getting the weave done without the copper clay drying out, but it was worth the effort. My instructor said that glycerine will help make it easier to create pieces like this because it keeps it from drying out too quickly. I can’t wait to try using it.

To make this piece, I rolled out a bit of copper clay about three cards thick (three cards as in playing cards, which is a great way to measure the thickness of your clay). Then I cut out a one inch square which was then cut into five roughly even strips. After weaving them together while keeping water on the strips (copper clay dries out quickly), I then cut out two more one inch strips. This was mostly because I was improvising. Next time, I’ll cut out a rectangle and be done with it. Those strips were put across the top with a jump ring smooshed between them. Continue reading

Metal Clay Jewelry

For the past few weeks, I have been in a metal clay jewelry class. So far we have been working with copper metal clay, and it is so fun.
Metal Clay Pendants
In the spring, I wanted to try working with precious metal clay, but it was a bit intimidating due to the cost and needing to work with a torch or a kiln (neither of which I have… yet). Most of what I have tried so far has been self-taught with the help of books the trusty internet for instructions. So I decided to enroll in a class and learn from someone who is familiar with metal clay.

I am so, so glad I did. In the first class I took, we started with silver metal clay. It was lovely to work with, but a bit intimidating because it is expensive. We did a little work with copper metal clay in that class, but not a whole lot. Continue reading

Impulse Buy – Bracelet Kit

During one of my excursions to Michaels, I stopped to look at the “impulse buy” stand near the checkout counter. One of the items was a little bracelet kit with beads and cord. It looked relatively easy and was only about $3, so I impulsively bought it.

Cord and bead bracelets

It turned out to have enough material for 2 bracelets. The instructions were pretty good and I made the first bracelet rather quickly. I did modify it a bit because I wanted it to fit tighter than the it would have been by following the instructions exactly.

One of the things I was most excited about was learning a new knot. This bracelet required tying box knots between the beads. Usually I’m not very good at tying knots, so this was a big deal for me. Continue reading